13 Running the Simulation
This part of the user guide will describe the process of running a simulation project. It also describes the possible performance measure outputs from the simulation and viewing an animation of the simulation results.
Before a simulation can be started, a valid network must be created and loaded into the simulation engine. More information about network creation is contained in chapters: Custom Network Editor, Freeway Quick Editor, and Two-Lane Highway Quick Editor.
To run a simulation of your network, press the “Simulation” button from the top-level toolbar.

Figure 13.1: Simulation Control Panel Button
This will load the Simulation Control Panel.
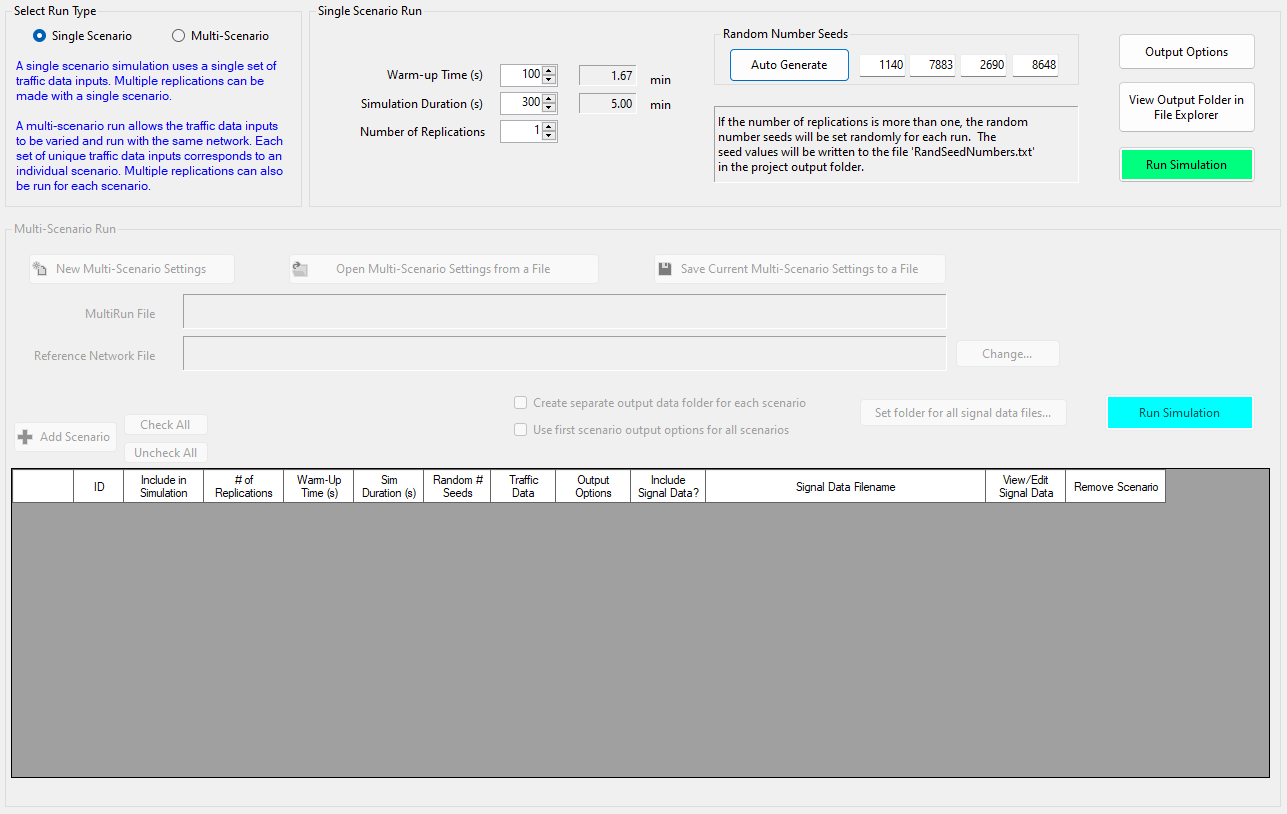
Figure 13.2: Simulation Control Panel
You can choose one of two run types:
- Single Scenario: This option uses a single set of traffic data outputs. Any number of replications can be made with this option. To run a single-scenario simulation, press the green-colored ‘Run Simulation’ button.
- Multi-Scenario: This option allows the traffic data inputs to be varied and run with the same network. Each set of unique traffic data inputs corresponds to an individual scenario. Multiple replications can also be run for each scenario. To run a multi-scenario simulation, press the cyan-colored ‘Run Simulation’ button.
13.1 Single-Scenario Run Settings
13.1.1 Warm-up Time
This field dictates how long the traffic simulation will run before performance measurement data are collected. Enter a number between 1 and 3600 s. Anything entered above 3600 s will be defaulted back to 3600. This time should be set to a value such that the network will be filled with traffic when it expires. For a small network such as an isolated intersection, a warm-up time of 300 s (5 min) should be sufficient.
13.1.2 Simulation Duration
This field dictates how long the traffic simulation will run after the warm-up time. Enter a number between 1 and 7200 s. Any entered value above 7200 s will be defaulted back to 7200. Performance Measures are collected during this time.
13.1.3 Random Number Seeds
The random number seeds affect the various items within the simulation program that rely on random numbers. More specifically:
- 1st Random Number Seed – Applies to vehicle entry generation
- 2nd Random Number Seed – Applies to vehicle type generation
- 3rd Random Number Seed – Applies to driver type generation
- 4th Random Number Seed – Applies to all other randomly generated inputs
For the same inputs, the results for a simulation run will be at least slightly different from a previous simulation run if any of the random number seeds were different for the respective runs. The seed numbers can be entered manually (any integer value), or they can be automatically created by pressing the “Auto Generate” button. If you desire to recreate the results exactly of a previous simulation run, use the same random number seeds. Note: When a simulation is run, a “RandSeedNumbers” text file is written to the project output folder. This file will include the random seeds and the date/time of the simulation run. If the file already exists in the folder, these values will be appended to the bottom of the existing entries in the file. When saving a project, the current random seed values will be saved in the project file (discussed later in this guide).
13.1.4 Number of Replications
The number of times to repeat a simulation run. If the specified number of replications is more than one, the random number seed will be set randomly for each one run. The seed values will be written to the file ‘RandSeedNums.txt’ in the project output folder.
13.1.5 Output Options
The ‘Output Options’ dialog allows you to select the various data items you would like generated from the simulation and saved to files. These output options are described in Simulation Output Data.
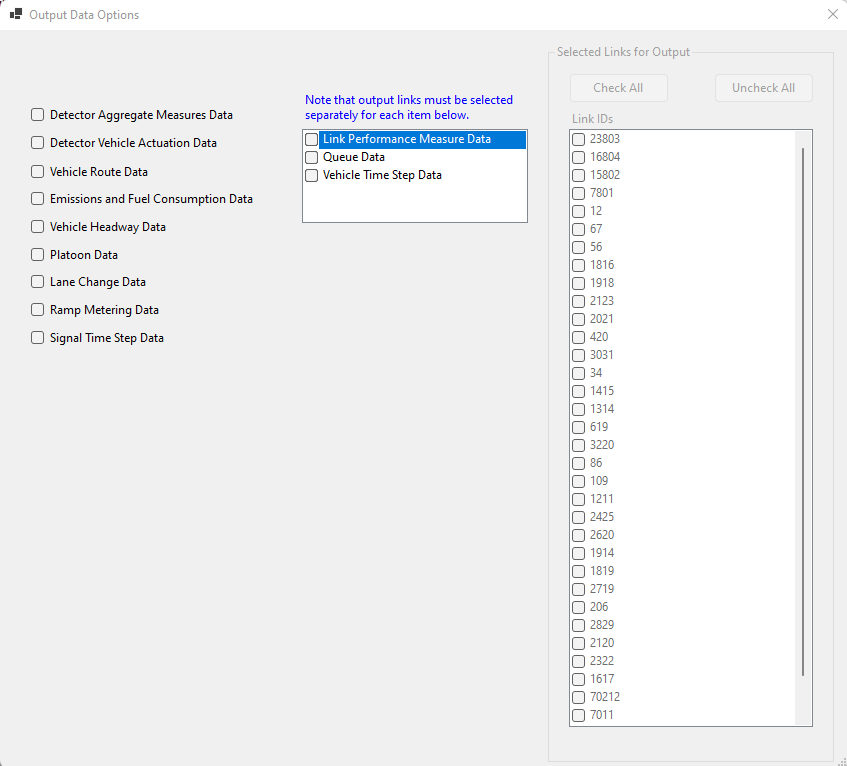
Figure 13.3: Simulation Output Options
13.2 Multi-Scenario Run Settings
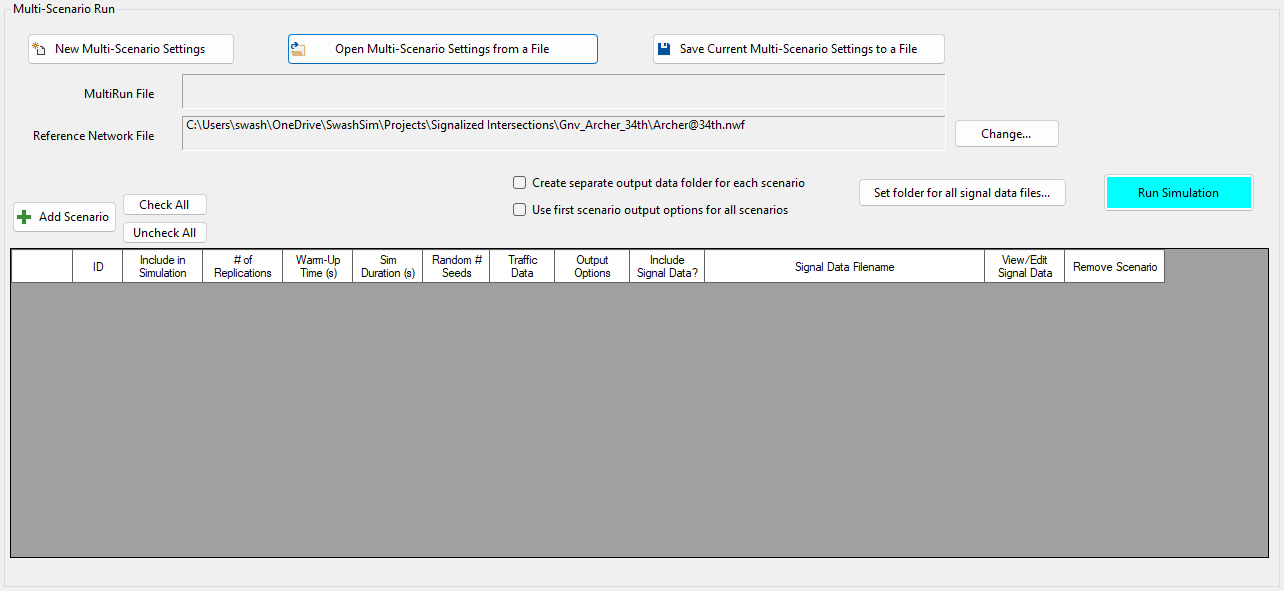
Figure 13.4: Multirun Settings
Begin by pressing the ‘New Multi-Scenario Settings’ button. Next, press the ‘+ Add Scenario’ button to add a new scenario. Repeat this as necessary for the total number of scenarios desired. Settings for each scenario are as follows.
Include in Simulation: If this box in checked, the corresponding scenario settings will be included in the simulation runs.
# of Replications: This setting is the same as for the single-scenario option.
Warm-up Time: This setting is the same as for the single-scenario option.
Sim Duration: This is the amount of time the simulation will run beyond the end of the warm-up time. Performance measure statistics are collected during this time.
Random # Seeds: Pressing the ‘Set’ button will load the following input screen. The number of rows in this form will correspond to the number of replications specified. To run a scenario replication with random number seed values, use ‘0’ in the four cells to the right. Pressing the ‘Generate’ button in the second column (‘Use Random Values’) will place zeros in these cells. To use specific random number seed values, but have them generated randomly by the program, press the ‘Generate’ button in the third column (‘Generate Values’). You can also directly enter any specific values desired into these cells. The values need to be positive integers in the range of 0-65535.
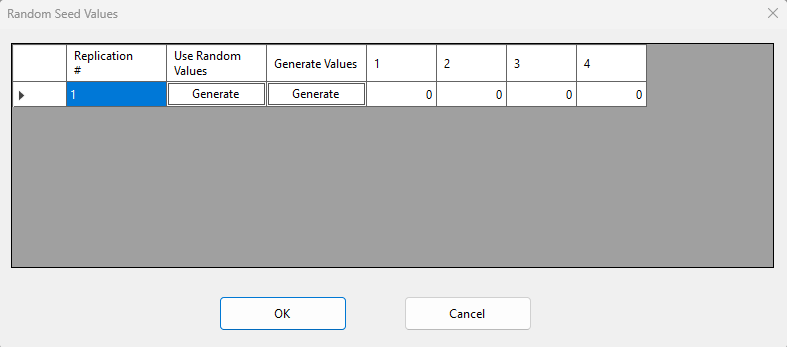
Figure 13.5: Multirun Random Number Seed Values
Traffic Data: Pressing the ‘Set’ button will load the ‘Entry Link Inputs’ input dialog. It is similar to the traffic dialog described in the Custom Network Traffic Data section. The multi-scenario version differs in that provides a drop-down list at the top to choose each entry node in the network.
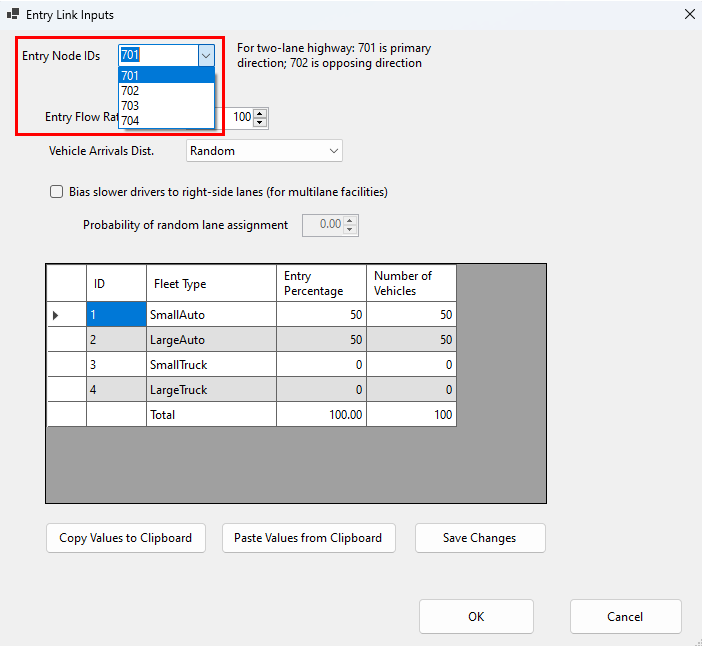
Figure 13.6: Multirun Random Number Seed Values
Output Options: The output options are are the same as for the single-scenario option. If you want to use the same output options for each scenario, set the output options as desired for the first scenario and then check the box ‘Use first scenario output options for all scenarios’.
Once all simulation parameters are input, press the cyan-colored ‘Run Simulation’ button. All multi-run scenarios that are checked in the ‘Include in Simulation’ column will be executed. A run progress dialog will be displayed for the duration of all simulation runs.
Include Signal Data: If this box is checked, you can select a signal timing data file for the scenario. Thus, a different file (i.e., different signal timing plans) can be specified for each scenario.
The multi-scenario run settings can be saved to a separate file. If the project is saved after saving these settings to a file, the muti-scenario settings file will be linked to the project file.